Common RV AC Problems and How to Fix Them
Table of Contents
Staying cool in your RV during the hot summer months is essential, and your RV air conditioner plays a key role in that comfort. However, like any appliance, AC units are prone to issues that can affect their performance.
From poor airflow to electrical malfunctions, these common problems can quickly turn your peaceful getaway in your recreational vehicle into a frustrating experience, especially if you find your AC in RV not working. In this guide, we’ll explore the top common RV air conditioner problems and provide you with practical solutions to keep your cooling system running smoothly so you can enjoy your travels without the heat.
RV A/C Diagnosis Cheat Sheet: Quick Fixes for Common Issues
Use this cheat sheet to zero‑in on likely causes before you break out the toolbox.
| Symptom | Likely Culprit | Try This First |
|---|---|---|
| A/C won’t power on | Tripped breaker, loose 120 V cord | Reset breaker, confirm shore‑power voltage |
| Blows warm air | Dirty filter, frozen coil | Clean or replace filter; thaw coil for 30 min. Ensure the foil tape in the plenum above the filter is in good condition and is preventing cold air from leaking into the return air side |
| Short‑cycles every 2 min | Low voltage, bad thermostat, or indoor coil freeze probe improperly positioned; Consult operating manual and verify probe placement in coil | Test campground voltage; swap thermostat batteries |
| Rattles or squeals | Loose fan, worn belt (in chassis cabin A/Cs), mud dauber or wasp nest on fan blade, or in fan hub | Tighten screws; lube motor |
| Musty smell | Mold in drip pan | Clean pan, add vinegar solution, clear drain holes, and test for adequate flow |
By following this cheat sheet, you can quickly identify and address common RV air conditioner issues before they become major problems. A little troubleshooting can often save you time and effort, allowing you to get your AC up and running smoothly again. In the next sections, we will dive deeper into each of these common problems, exploring their causes in detail and providing quick fixes to help you resolve them efficiently.
A/C Not Working
Let’s start with the scariest scenario – a silent unit. If your RV air conditioner isn’t working, start with these steps to identify the issue and find a fix. We’ll guide you from basic power checks to more advanced troubleshooting.
Shore Power & Breaker Check
Potential Problem:
- The 30A/50A plug may not be fully seated.
- There could be an issue with the RV breaker panel or the campground pedestal.
Fix:
- Ensure the 30A/50A plug is properly seated in the power outlet.
- Inspect both the RV breaker panel and the campground pedestal for any issues. Make sure you are plugged into shore power correctly.
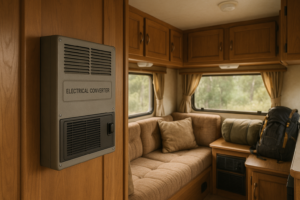
- 12-Volt Power System Check
Potential Problem:
- The RV A/C’s control board relies on 12V DC power. A blown fuse or a low house battery can cause the unit to appear dead.
Fix:
- Check the fuse, battery, and disconnect switch. Replace any blown fuses, make sure the house battery is fully charged, and confirm that the battery disconnect switch is turned on if your RV is equipped with one.
- Nothing Helps – Now What?
- If none of the above fixes resolve the issue, it may be time to call a mobile technician. Electrical troubleshooting beyond the capacitor can become complex and may void any existing warranties.
RV A/C Not Cooling – Fan Runs, Air Is Warm
If the blower’s humming, but the cabin still feels like Phoenix in July, odds are the issue is airflow or refrigerant. Here’s how to pinpoint the cause:
- Clean or Swap Air Filters
Potential Problem:
- Clogged filters can restrict airflow (CFM) by up to 50%.
Fix:
- Wash both filters in warm, soapy water to restore airflow. This is a basic tip for regular RV AC maintenance.
- Thaw a Frozen Coil
Potential Problem:
- Ice on the fins typically results from low airflow or low refrigerant. This can also be a cause of weak airflow.
Fix:
- Turn the RV A/C off for 30 minutes.
- Run the fan only to thaw the fins in the coil.
- Restart the cooling and monitor the performance.
- Tighten the Duct Collar
Potential Problem:
- Potential Problem: In ducted ceiling systems, the foam or foil collar can separate or leak, allowing cold air coming out to escape into the return air space above the filter. This misdirected airflow can overcool the indoor coil (evaporator and condenser coils) and cause it to freeze up.
Fix:
Use HVAC foil tape to seal the collar in seconds and direct the cold air into the cabin.
- Low Refrigerant?
Potential Problem:
- If the refrigerant is low, it’s likely due to a leak in small rooftop units that are factory-sealed.
Fix:
A certified RV-HVAC technician must evacuate and recharge the system if the refrigerant is low. This requires specialized technical knowledge.
A/C Short‑Cycles or Trips Breakers
Rapid on-off cycling is not only annoying but also indicates potential voltage or thermostat issues, which can lead to costly repairs. Short cycling wastes energy and provides minimal cooling power. Here’s how to fix common issues:
- Measure Voltage
Potential Problem:
- Many U.S. campgrounds experience voltage drops to 105V during hot weekends, which can overheat the compressor and cause it to shut down.
Fix:
- Use a plug-in voltmeter to check the voltage. If it’s below 108V, add an auto-former or switch parks.
- Calibrate or Replace Thermostat
Potential Problem:
- Battery-powered thermostats can misread temperatures when their batteries are low.
- A misplaced freeze probe in the indoor coil above the filter can cause short cycling and icing.
Fix:
- Swap batteries twice a year to ensure accurate temperature readings and proper operation.
- Ensure the thermostat is not on an outside wall, near a hot appliance like the cooktop, or in a position that an AC vent is blowing on it. The location of your thermostat is crucial for accurate readings.
- Test Start-Up Amps
Potential Problem:
- A worn start capacitor can spike the current draw, causing breakers to trip.
Fix:
- Replace the start capacitor, as described in Section 1, to prevent excessive current draw. This is a common repair for an RV technician.
Weird Noises and Vibrations
Your rooftop RV A/C should hum, not squeal. Odd sounds act like early warning sirens, so let’s quiet them before they escalate into bigger issues.
- Rattling Screws
Potential Problem:
- Loose mounting bolts (loose screws) can cause rattling noises.
Fix:
- Remove the shroud and tighten any loose mounting bolts.
- Fan Blade Rub
Potential Problem:
- The squirrel-cage fan can shift on bumpy roads, causing the blades to rub against the housing. Also, check for mud dauber or wasp nests on the fan blades and hubs, which can disrupt proper operation. This can block airflow.
Fix:
Realign the set screw to ensure the blades clear the housing.
- Motor Bearings
Potential Problem:
- A high-pitched squeal typically indicates dry motor bearings.
Fix:
- Apply a few drops of non-detergent electric-motor oil to quiet the noise. If the noise persists, the motor may need to be replaced.
Smells, Drips, and Other “Ew” Factors
Funky odors and rogue drips may seem minor, but they’re clues to moisture problems that can damage both equipment and air quality. Here’s how to tackle them:
- Musty Odor
Potential Problem:
- Algae buildup in the condensate pan can cause a musty smell.
Fix:
- Flush the pan with a 50/50 white vinegar solution, then rinse thoroughly.
- Water Dripping Inside
Potential Problem:
- Clogged drain holes can cause water to backflow into the ceiling ductwork.
Fix:
Use a plastic zip-tie to clear each drain hole and restore proper drainage.
- Black “Crud” on Fins
Potential Problem:
- Mold growth on the fins is often seen as black “crud.”
Fix:
- Spray a non-corrosive coil cleaner on the fins and gently rinse with a low-pressure hose.
Preventive Maintenance Tips for RV A/Cs
A few minutes of routine care can head off nearly every issue outlined above – here’s the maintenance playbook.
- Regular Cleaning: Keep filters and coils free of dust and debris to maintain peak airflow and cooling efficiency. This is key to keeping your unit working well.
- Scheduled Inspections: Schedule a professional A/C check-up each spring – or more often if you travel year-round – to catch minor issues before they snowball. An expert can help you with this.
- DIY Test: Run the AC for 20-30 minutes or until it is blowing very cold air. Measure the air temperature from the nearest vent, and again at the return air filter. Subtract the 2 numbers and the result should be 16 – 24 degrees F. If your result is higher or lower, schedule a professional inspection as soon as possible. This tip helps you troubleshoot.
Proper Usage: Set the thermostat between 72°F and 78°F, use shade whenever possible, and avoid continuous 24/7 operation that can overwork the compressor. You want to make sure you’re operating the AC system efficiently.
When to Seek Professional Help
Even the most experienced RVers and camper owners encounter challenges now and then. You should know when it’s time to call a pro for your RV air conditioner problems. DIY fixes stop where safety and specialized tools begin. Call in a certified RV tech when you notice any of the following:
- Refrigerant Leaks: Oily residue around fittings or persistent ice-ups signal a sealed-system breach that only licensed pros can evacuate and recharge. This is a job for a certified RV technician.
- Compressor Trouble: Frequent breaker trips, loud clunks, or a compressor that won’t start even with a new capacitor all require a professional diagnosis.
- Motor or Fan Replacement: Grinding noises or a seized blower motor demand parts sourcing and wiring, best left to experts.
- Start Capacitor Replacement: If the A/C won’t start or struggles to turn on, a faulty start capacitor could be the cause. Replacing this component involves specialized knowledge and tools.
- Burnt Wiring Smells: Electrical faults can escalate fast; shut off power and call a professional.
If your RV air conditioner is not working, and you need a backup? If your troubleshooting hits a wall, or you’re specifically thinking “my camper air conditioner not working and I’ve tried everything,” call RV ProCare’s mobile RV AC repair team. Certified RV technicians come to you, so you get back to cool comfort without leaving the campground. An RV owner should consult an expert when facing complex issues. By having a better understanding of what might be going wrong, you’ll be able to discover effective solutions to fix common problems and stay cool.
Where We Offer RV Service
At Good Sam RV ProCare, we’re proud to offer mobile RV repairs wherever the road takes you. Call us at 833-782-2731 or check our serviceable areas to see where our technicians can assist you.
Final Thoughts
Mastering these RV AC fixes means more campfire stories and fewer sweaty nights. From quick filter swaps to voltage checks, most common RV air conditioner problems boil down to basic tools and a bit of patience. When issues outgrow your toolkit, a qualified mobile tech can rescue the rest of your vacation.
Stay frosty out there and happy travels!