RV Hookups Explained – A Beginner’s Guide to Setting Up at Campgrounds
Table of Contents
RV hookups are the utility connections that allow your RV to function like a home on wheels. When you park at a campground or RV site with hookups, you can access essential services like electricity, fresh water, and waste disposal—all of which make extended stays more comfortable and convenient. If you’re new to RVing, it’s helpful to know about RV hookups to ensure you’re properly connected and can fully enjoy your trip.
There are generally three main types of RV hookups:
- Electrical hookup (commonly 30-amp or 50-amp service) powers your lights, appliances, and HVAC systems.
- Water hookup connects your RV to a pressurized, potable water supply for sinks, showers, and toilets.
- Sewer hookup allows you to dispose of wastewater from your gray and black tanks directly into a sanitary drain.
Together, these hookups form what’s called a “full hookup” site. Some campgrounds may offer only partial hookups, such as electricity and water without sewer. In contrast, dry camping (or boondocking) refers to parking without any external hookups at all.
Understanding the different hookup options helps you choose the right site based on your RV’s systems and your trip’s needs—whether you’re planning a weekend getaway or a long-haul adventure.
Types of RV Hookups and How They Work
Hooking up your RV at a campground allows you to use your vehicle’s utilities just like you would at home. Understanding how each connection works—water, sewer, and electricity—ensures a safer, smoother experience and helps prevent costly mishaps on the road. Whether you’re in a smaller RV or a larger one, getting the setup right is key to a successful stay.
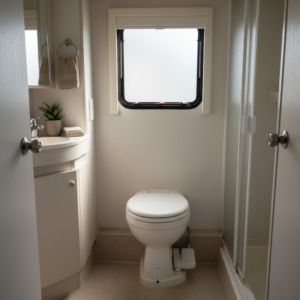
1. Water Hookup
Connecting your RV to a potable water hookup gives you access to fresh, pressurized water for drinking, cooking, and cleaning. Most campgrounds provide a threaded spigot that connects to your RV’s city water inlet via a drinking-safe hose.
Tips for avoiding leaks and contamination:
- Always use a potable water hose, not a garden hose.
- Attach a water pressure regulator at the spigot to prevent burst lines from high pressure. For on-demand water heaters, an adjustable regulator set to 55 psi is recommended.
- Run the water briefly before connecting to clear out debris.
- Sanitize your system regularly, especially after long-term storage.
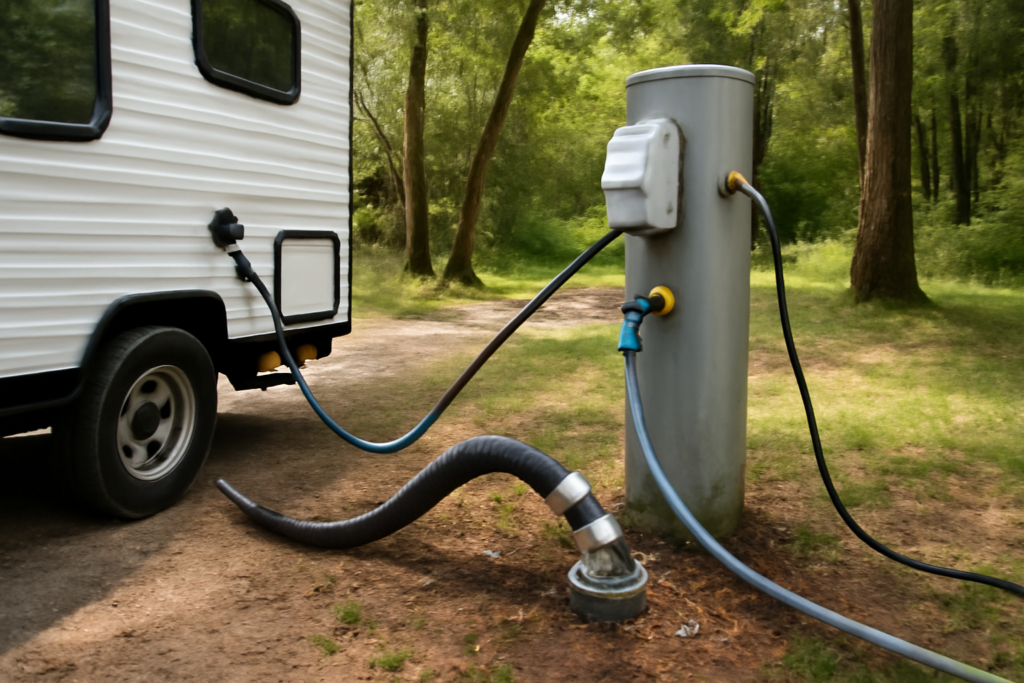
2. Sewer Hookup
The sewer hookup lets you empty your black and gray water tanks directly into the campground’s waste system, eliminating the need to visit a dump station during your stay. You’ll use a flexible sewer hose to connect your RV’s outlet to the site’s sewer drain.
Hygiene and safety best practices:
- Use rubber gloves while handling hoses.
- Ensure a tight seal at both ends to avoid spills or odors.
- Keep the hose sloped downward for proper flow.
- Only open the black tank valve when it’s at least half full to prevent clogs.
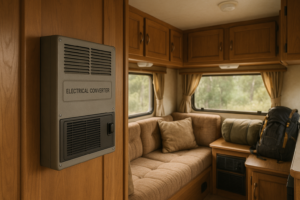
3. Electrical Hookup
Campground electrical hookups usually come in 30-amp or 50-amp service types, depending on the site and your RV’s requirements. These power sources allow you to run lights, air conditioners, refrigerators, and other essential appliances.
Safety essentials:
- Know whether your RV uses 30-amp, 120v service or 50-amp power before connecting.
- Use the correct power adapter if the pedestal doesn’t match your plug.
- With the breaker off, plug your twist-lock cord into the surge protector first, then connect the surge protector to the pedestal to minimize any arcing.
- A surge protector is highly recommended to guard against voltage spikes or faulty wiring. It also provides an indication of whether power is present and correctly wired at the pedestal.
Step-by-Step Guide to Hooking Up Your RV
Whether you’re a seasoned traveler or setting up for the first time, connecting your RV to campsite hookups requires a systematic approach. Following the right sequence ensures your utilities work safely and reliably—while minimizing the risk of equipment damage or contamination.
Pre-Checks Before Connecting
Before you begin, inspect the RV site and your hookup gear:
- Confirm the site has the correct amp service (30 or 50 amp) for your RV.
- Examine the pedestal, water spigot, and sewer drain for visible damage or debris.
- Lay out your hoses, adapters, and surge protector so they’re ready to use.
- Turn off all appliances and switches inside the RV before making connections.
Connection Order: Electric, Water, Sewer
1. Electrical Hookup:
- Plug your surge protector into the power pedestal.
- Connect your power cord to the surge protector.
- Flip the breaker switch on the pedestal after connecting.
- Turn on appliances inside one by one to prevent overload.
2. Water Hookup:
- Attach a water pressure regulator to the spigot.
- Connect your drinking-safe hose to the regulator and your RV’s city water inlet.
- Slowly turn on the water to pressurize the system gradually.
3. Sewer Hookup:
- Connect your sewer hose to your RV’s waste outlet and the campground’s sewer inlet.
- Use a hose support to maintain a downhill slope for better drainage.
- Keep the black tank valve closed until it’s at least halfway full; the gray tank can stay open.
Disconnection Tips and Checklist
When it’s time to leave:
- Shut off appliances inside the RV and turn off power at the pedestal.
- Disconnect the power cord and store it safely.
- Close all tank valves, then disconnect and rinse your sewer hose using the campground’s water hookup (not your drinking hose).
Pro Tip: Dump the black tank first and the gray behind it to help clear any waste from the sewer hose.
- Turn off the water, remove the hose, and let it drain before storing.
- Walk around your RV to ensure all connections are properly sealed and nothing is left behind.
Need Help on Site?
If you encounter setup issues—like a tripped breaker, faulty power supply, or a leaking hose—our RV technicians offer professional mobile RV repair and diagnostic services. Their certified technicians come directly to your location, so you can avoid the inconvenience of towing your RV to a service center. Whether you’re parked at a campground, at home, or in storage, ProCare ensures your setup is safe, secure, and fully functional.
What to Look for When Booking an RV Site with Hookups
Not all RV campsites with hookups offer the same experience. Whether you’re staying for a night or settling in for an extended trip, choosing the right site can significantly impact your comfort, convenience, and safety. Here’s what to consider when booking an RV site with hookups:
1. Hookup Types Offered
Look closely at whether the site provides:
- Full hookups (electricity, water, sewer)
- Partial hookups (usually just electricity and water)
- Electric-only or dry camping options
Sites with full RV hookups offer the most convenience, especially for longer stays.
2. Electrical Compatibility
Confirm that the site supports your RV’s electrical needs:
- 30-amp or 50-amp service, depending on your rig
- Nearby pedestal condition and distance from your RV’s inlet
- Avoid sites with outdated or poorly maintained electrical systems
3. Water and Sewer Accessibility
Make sure:
- The fresh water hookup is clean, accessible, and allows for secure hose attachment
- The sewer drain is at a reasonable distance and in good condition for leak-free disposal
Sites with well-maintained utilities reduce the risk of contamination, odor, or clogs.
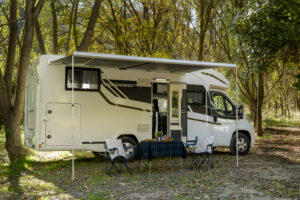
4. Site Layout and Space
Check whether the site:
- Offers enough space to easily park and level your RV
- Is pull-through or back-in depending on your preference
- Has room for slide-outs, awnings, and outdoor seating
A spacious layout makes setup and daily use more enjoyable.
5. Campground Reviews and Location
Look at recent traveler reviews for insights into:
- Pedestal reliability and water pressure consistency
- Overall cleanliness, Wi-Fi availability, and noise levels
- Safety of the area and responsiveness of campground staff
Choosing a reputable campground ensures fewer surprises after arrival.
6. On-Site Support Availability
While not every issue is foreseeable, having access to mobile RV repair services can offer peace of mind—especially if you’re staying in remote or high-traffic areas.
Traveling through popular RV regions like Florida or South Carolina? We offer services in these areas, offering on-site diagnostics and repair in case your hookups don’t work as expected.
Final Tips for First-Time RVers
If you’re new to RV camping, getting familiar with hookups can feel overwhelming—but a little preparation goes a long way. Whether you’re staying at a full hookup campground or using partial hookups, these tips will help you stay safe, comfortable, and ready for the road.
1. Pack the Right Essentials
Always carry the basic gear you’ll need for safe and sanitary connections:
- A drinking-safe water hose
- A water pressure regulator to prevent line damage
- A surge protector for your electrical hookup
- A sewer hose with proper seals and support
- A set of rubber gloves for handling waste connections
- Adapters for 30 amp and 50 amp conversion if your RV uses a different plug type
Keeping spare hoses, connectors, and fuses onboard ensures you’re prepared for unexpected failures or campsite variations.
2. Practice Setup Before Your First Trip
Before heading to your first campground, simulate the full hookup process at home or in storage:
- Practice leveling your RV and connecting to mock hookups
- Test all utility systems—electric, water, and sewer
- Learn how to properly fill and dump tanks without stress
This dry run helps you avoid common beginner mistakes and gives you more confidence on the road.
3. Always Have a Backup Plan
Even with the best preparation, things can go wrong—like a tripped breaker, faulty spigot, or broken valve. Having a backup plan ensures you’re not stranded without help.
We offer mobile RV maintenance at your location. If you run into trouble with your hookups—whether at a campsite, at home, or in storage—their certified technicians can diagnose and fix the issue on-site, often within 24 hours.
With a bit of preparation and the right support system in place, using RV hookups becomes second nature. You’ll spend less time worrying about utilities and more time enjoying the open road.
Frequently Asked Questions (FAQs)
What should I do if my hookup isn’t working?
First, double-check your connections:
- For electrical hookups, ensure breakers are turned on, your surge protector is functioning, and you’re using the correct amp plug (30 amp or 50 amp).
- For water hookups, confirm the spigot is open, your hose is securely attached, and your water pump (if used) is turned off when connected to city water.
- For sewer hookups, make sure your valves are functioning and your hose is properly connected and sealed.
If the issue persists—such as low voltage, no power, a leaking water line, or a backed-up sewer hose—it’s best to get professional assistance.
Can I use a 50 amp plug in a 30 amp site?
Yes, but only with the proper adapter. If your RV has a 50 amp power system and you’re at a site that offers only 30 amp service, you’ll need a 30-to-50 amp adapter (commonly called a “dogbone adapter”). This allows you to plug in safely, though you’ll only have access to 30 amps of power.
Important tips:
- Be mindful of your power usage to avoid tripping the breaker.
- Avoid running multiple high-wattage appliances at once (like air conditioners and microwaves).
- Always use a surge protector to prevent damage from unstable power sources.